Invited: The Power of Hospitality in an Age of Loneliness

I have just started reading the book, Invited: The Power of Hospitality in an Age of Loneliness by Leslie Verner.  I saw it at the library and thought it looked interesting.  I just read something that I’ve never really thought about before and would like to see what you all think.

To give some context, in the midst of sharing some statistics about the effects of the smartphone on teenagers and people in general, Leslie ponders how phones “tug at the threads of community, intimacy, and relationship.”

Here’s what stood out to me:  She states that a lot of what we used to ask of another human being, we now ask of Google.  Instead of seeking advice from family members and friends, we now type our questions into a search bar or ask strangers in a Facebook group.  She feels that convenience has whisked us out of relationship.

I can see what she’s staying.  We can do all kinds of things now and never have to interact with anyone.  I used to work at a bank where we encouraged customers to participate in online banking.  As employees we needed to reach goals for getting customers to sign up for various services but how were we to do that when online banking reduced the number of customers that actually came to the bank? I honestly don’t know the last time I went to the bank, much less INTO the bank, to process a transaction.  There are many examples that show how we now can limit our social interactions if we so choose.

Anyway, I ask Google all kinds of things.  It is pretty easy and convenient.  However, after reading this I am going to challenge myself to not ask Google and instead ask a human.  Should I try doing this for a week? A month? There are all kinds of things I want to know – surely someone out there will talk to me about it, right? I think it would make the other person feel good to be asked something, maybe make them feel valued or that they have something to contribute to the world.  Maybe it will surprise them, maybe they’ll say I should just Google it.  I won’t know until I ask.

So who’s with me? Are you up for the Human vs. Google Challenge? Surely there’s a catchy hashtag for this kind of thing…

Is it ironic that I’m posting this on a blog? Okay, I will also challenge myself to discuss this with some people in person too, perhaps while sharing a meal or a cup of tea.

Flourless Chocolate Cake

Happy Independence Day!

I made this cake to celebrate some good ol’ fashioned Red, White and Blue and it turned out really well.  It was my first time making a flourless chocolate cake and I’m hooked.  It’s great for gluten-free and gluten-loving chocolate lovers! You can “accessorize” it however you want, which makes it a great recipe to keep handy all year ’round.

Flourless Chocolate Cake
from King Arthur Flour

Ingredients
Cake
1 cup semisweet or bittersweet chocolate chips
1/2 cup (8 tablespoons) unsalted butter
3/4 cup granulated sugar
1/4 teaspoon salt
1 to 2 teaspoons espresso powder, optional
1 teaspoon vanilla extract, optional
3 large eggs
1/2 cup unsweetened cocoa powder, Dutch-process cocoa preferred

Glaze
1 cup semisweet or bittersweet chocolate chips
1/2 cup heavy cream

What To Do
Preheat the oven to 375°F. Lightly grease an 8″ round cake pan; cut a piece of parchment or waxed paper to fit, grease it, and lay it in the bottom of the pan.

To make the cake: Put the chocolate and butter in a microwave-safe bowl, and heat until the butter is melted and the chips are soft. Stir until the chips melt, reheating briefly if necessary. You can also do this over a burner set at very low heat. Transfer the melted chocolate/butter to a mixing bowl.

Stir in the sugar, salt, espresso powder, and vanilla. Espresso enhances chocolate’s flavor much as vanilla does; using 1 teaspoon will simply enhance the flavor, while 2 teaspoons will lend a hint of mocha to the cake.

Add the eggs, beating briefly until smooth. Add the cocoa powder, and mix just to combine.

Spoon the batter into the prepared pan.

Bake the cake for 25 minutes; the top will have formed a thin crust, and it should register at least 200°F on an instant-read thermometer inserted into its center.

Remove it from the oven, and cool it in the pan for 5 minutes.

Loosen the edges of the pan with a table knife or nylon spreader, and turn it out onto a serving plate. The top will now be on the bottom; that’s fine. Also, the edges will crumble a bit, which is also fine. Allow the cake to cool completely before glazing.

To make the glaze: Combine the chocolate and cream in a microwave-safe bowl, and heat until the cream is very hot, but not simmering. Remove from the microwave, and stir until the chocolate melts and the mixture is completely smooth.

Spoon the glaze over the cake, spreading it to drip over the sides a bit. Allow the glaze to set for several hours before serving the cake.

My Comments
For chocolate, I used semisweet chocolate chips and dutch processed cocoa.

I did include vanilla but not espresso powder.

I used an 8″ x 8″ pan, baked it for the same amount of time.

I made the glaze (chocolate ganache) while the cake was baking. I always make ganache in a pan on the stove.  Combine the heavy cream and chocolate chips and stir together on low heat.  I don’t trust the microwave.

After the cake had cooled and the ganache had cooled into a nice spreadable consistency, I frosted the cake and put it in the fridge overnight.  In the morning it was nice and firm and easy to slice.  I did rinse and dry my knife after each slice.  I sliced the cake into 16 squares.

I decided to whip some leftover heavy cream with a spoonful of powdered sugar and put little dollops on each piece, topped with fresh strawberry slices and blueberries, which I thought looked very nice for Independence Day.


This cake turned out super yummy and everyone loved it.  I think you’ll love it too and hope you try it out soon.  Have a wonderful day today celebrating our freedom!

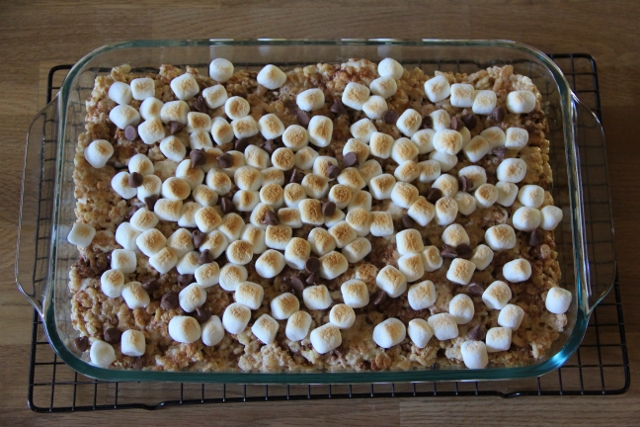
S’mores Marshmallow Crispy Treats

Happy fall, y’all! I know it hasn’t really felt like fall, at least here in central Illinois, but technically it is and that means bonfires and making s’mores and drinking hot cocoa! Sometimes having a bonfire isn’t feasible but thankfully there are about as many variations as there are leaves to rake.  Take these S’mores Marshmallow Crispy Treats, for example.  They have all the ingredients of a traditional s’more without the requirement of fire.  This recipe makes a lot of treats so it’s perfect for taking to festive fall gatherings.

S'mores Marshmallow Crispy Treats

S’mores Marshmallow Crispy Treats
slightly adapted from My Baking Addiction

Ingredients
6 tablespoons unsalted butter
2 10.5-ounce packages mini marshmallows, divided use
2 teaspoons pure vanilla extract
7 cups crisped rice cereal
9 full graham cracker sheets, chopped into small pieces
1 cup milk chocolate chips
optional: about 1.5 – 2 cups of mini marshmallows and about 1/2-cup of milk chocolate chips (sorry, I didn’t measure, just sprinkled them on)

What To Do
Spray with non-stick spray and/or spread some softened butter along the sides and bottom of a 9″ x 13″ baking pan and set aside.

In a large pan, melt butter over low heat.

Set aside 2 cups marshmallows.  Add the rest of the marshmallows to the pan and stir until completely melted.

Remove pan from heat and stir in the vanilla.  Gradually add crisped rice cereal and graham cracker crumbs; stirring until well coated.  Fold in the reserved 2 cups of marshmallows and chocolate chips until thoroughly incorporated.

Using a buttered spatula, or clean hands, firmly press the mixture into the prepared pan.

If desired, top with additional mini marshmallows and place on the center rack of the oven.  Turn the broiler on low and broil for about 5 minutes, watching carefully, until the marshmallows have browned to your liking.  Remove from oven and sprinkle additional chocolate chips on top.

Cool completely before cutting and serving.

My Comments
The bags of mini marshmallows I bought were 10 oz each.

9 full sheets of graham crackers is one full sleeve of crackers that come 3 sleeves in a box – I think this is pretty standard.

I both sprayed my pan and spread butter in it and it was super easy to get the bars out.

I think next time I will also sprinkle some chopped graham crackers on top.  I couldn’t really taste them in the bars and I think extra on top would look nice and give an extra graham cracker flavor boost.

Some Photos Along the Way
Butter and mini marshmallows melting together
S'mores Marshmallow Rice Crispy Treats

Stirring in cereal and graham crackers
S'mores Marshmallow Crispy Treats

Adding mini marshmallows and chocolate chips
S'mores Marshmallow Crispy Treats

The mixture pressed into the pan
S'mores Marshmallow Crispy Treats

Extra mini marshmallows on top
S'mores Marshmallow Crispy Treats

Turning the broiler on
S'mores Marshmallow Crispy Treats

Extra chocolate chips sprinkled on top
S'mores Marshmallow Crispy Treats


All I can say is YUMMY! I recently took these to a family function (where there was no bonfire) and they were a big hit.  So if you can’t have a real s’more, try this twist and I think you’ll be happy!

Cherry Tomato Galette

Happy Monday! It’s a much needed rainy day here in central IL and I’m happy to have some rainy day projects…one being to post this Cherry Tomato Galette recipe.  Things have been quiet here on Thirty Seconds on High for a while and I’m not sure when I’ll post again, but rest assured, I haven’t completely abandoned this blog, just needed a break.

So I did plant a garden this year (remember previous Garden posts?) and I got to expand this year since we had an ailing tree removed last fall which meant more sun-filled yard space.

This:
Back Yard

Turned into this.  It’s roughly 10′ x 30′ and I love every inch.
New Garden Space

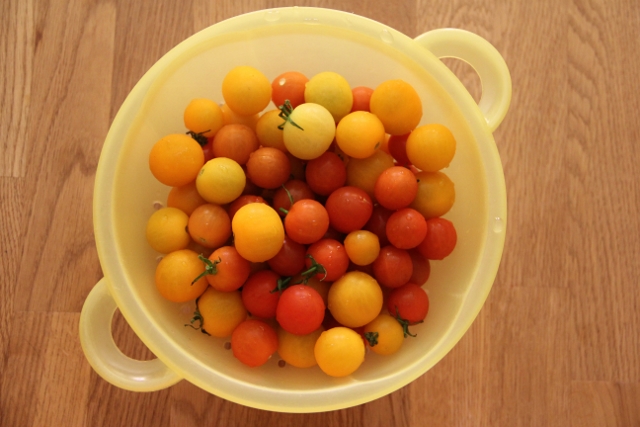
All this to say, I have a plethora of cherry tomatoes! I planted both red and yellow and they are as tasty as they are gorgeous!

Cherry Tomato Galette

A couple weeks ago I discovered Kitchen Vignettes on PBS Food.  It is a farm-to-table video blog and each one I have watched has been absolutely fascinating! I love it! I highly recommend taking some time to check it out.  One of the vignettes I watched was for this Cherry Tomato Galette.  Since I had cherry tomatoes I decided to try it out and I’m so glad I did because it was delicious!!! I’m definitely going to make another.  It wasn’t hard at all and it’s a great way to use up several cherry tomatoes.

Cherry Tomato Galette

Cherry Tomato Galette
slightly adapted from Kitchen Vignettes

Ingredients
Crust
Use your favorite single 9″ pie crust recipe (or buy one). I used KAF’s Guaranteed Pie Crust and used half (the other half is in the freezer for my next pie).

Filling
1/2 cup ricotta cheese
1/2 cup grated parmesan
About 1 pound of cherry tomatoes, halved
1 tbsp. olive oil
Freshly minced basil for garnish (4 or 5 basil leaves)
Salt and pepper, to taste

Glaze
1 egg yolk
1 tsp. water

What To Do
On a floured surface, using a floured rolling pin, roll the chilled dough into a large round about 12 to 14 inches wide and between 1/8 to 1/4 inch thick. Place the rolled-out dough on a piece of parchment paper on a large baking sheet. (You may find it easier to handle the dough if you roll it out directly onto the floured piece of parchment paper).

In a small bowl, mix the ricotta and grated parmesan together. Crumble and spread this mixture onto your dough, leaving a 2-inch border all around. Place your halved tomatoes, cut-side up, tightly together to fill the circle, leaving the 2-inch border intact. Fold the border edges of the dough inwards so that the tomatoes are encased by dough around the edges but exposed in the center. Brush the edges with the egg yolk glaze. Season with salt and pepper if you wish and drizzle the olive oil on top of the tomatoes.

Bake in a 375°F oven for about 45 minutes or until crust is golden.

Remove from the oven, let it cool for a few minutes before sprinkling shredded basil on top. Slice and serve.

My Comments
I prepped all ingredients before rolling out my pie crust.

I just happen to have a lifetime supply of 12″ round parchment papers so carefully rolled up my pie crust onto the rolling pin then unrolled it onto the parchment paper.  You can then use the parchment paper to help fold the edges inward to make the border crust.

This smells great while baking and it tastes so good! I highly recommend buying a wedge of Parmesan cheese and shredding it yourself, as opposed to buying pre-shredded.  The flavor is incredible!

Some Photos Along the Way
Grating parmesan cheese
Cherry Tomato Galette

Cherry tomatoes, cheese filling, pie dough
Cherry Tomato Galette

Pie dough rolled out
Cherry Tomato Galette

Crust with cheese filling
Cherry Tomato Galette

Add the cherry tomatoes
Cherry Tomato Galette

The edges folded up and glazed, sprinkled with salt & pepper, drizzled with olive oil
Cherry Tomato Galette

Fresh from the oven
Cherry Tomato Galette

Basil from the garden
Cherry Tomato Galette

Want a slice?
Cherry Tomato Galette

Or two?
Cherry Tomato Galette


I know this is a lengthy post but it’s been a while and I really wanted you to see this recipe.  “Galette” sounds fancy and maybe even hard but it’s really just a “rustic” pie and therefore doesn’t have to be perfect.  It’s really really really good and I hope you try it out especially while there are fresh cherry tomatoes.  Someone recently told me that “fresh is best” and I completely agree!

Enjoy!

Thankful Thursday & Taking a Break

Good morning! Welcome to “Thankful Thursday,” a weekly time and place inspired by the book, One Thousand Gifts, to think about how we’ve been blessed.  I hope you join in on the fun – what are you thankful for this week?

Here’s my list for this week.  I thank God for:

1 – the opportunity to be involved in a community event

2 – safe and fun small road trip with Matt and his dad

3 – all of you who read and support this blog…as you have seen, I’ve not posted much for a while…I’m going to take a bit of a break but will leave this site up for you to view recipes and such.  I hope to post more at some point, but I’m not sure when that will be.  Thank you all so much!